Wednesday, October 24, 2012

Text-Based Art Projects

I. ASCII projects
GlassGiant ASCII
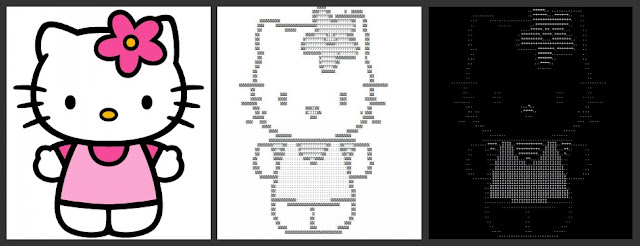
The pictures for my first ASCII work on GlassGiant.com are of lovely Hello Kitty and SpongeBob. The art convertor was very simple and easy to work with. I applied default setting and input the web URL to the image. Then got the results.
 
Convert into ASCII 
Original Ladybug Image
 Convert into HTML
 Original Image of Little Yini
 Convert into Matrix
Convert into ASCII
Convert into HTML
 Original Ted Image
TEXT-IMAGE ASCII
There are three types of convertors on the TEXT-IMAGE.com. The program has more good features and fun. As shown in above, I practiced ASCII, HTML and Matrix convertors respectively. Teddy bear one should be my favorite and most successful piece so I converted  it to all three forms.
 
II. Tag Coulds Project
 
For this project, I used Tagxedo Creator. Firstly, I uploaded the lyric of a song called Love Paradise. Therefore, I chose the one of heart shapes to match with the meaning. Then set the theme color as constantin and the font as Vladimir Script. Finally, the result was saved as 2MP PNG file.
 
III. Textorizer Projects

Textorizer 1
I used the sketch of me and my husband to make this textorizer 1 image. Firstly, I cropped the picture using Pixlr Advaned and saved it. Then uploaded it on Textorizer 1. Then I input the text words as love happy brian yini and set the opacity as 0. The number of strings was about 12000 and the range of font sizes was 10-28. After set the output size as 1236x1000, I made the final image.

 
Textorizer 2
The theme of this image is baby Yini and her parents. I remember the opacity was set as 150. The words I input was an essay from online talked about "love between my parents and me".  

 
Excoffizer
I want to use this one as an example to explain how I made these pictures. The output size was set to 1005x1196, the numbers of opacity, angle, wiggle, and space between lines ware adjusted as 50, 30.9, 13.5, 3 respectively. And the stretch X and Y were 1.1 and 1.2. All these settings were obtained through my experiments. By the way, the photo is of my favorite top famous singer in China called Chris Lee. I found the result made the best effects as well as kept her charming look.

Wednesday, October 17, 2012

Typology- Becher Grid

Types of Perfume Bottles
I took 16 pictures of my favorite perfume bottles before using the photo editing program- Pixlr's Advanced Photo Editor. Then I opened one image on Pixlr's, and started adjusting the level of image in order to get the best tone (i.e. brightness value). Actually, it wasn't too hard once you figure out how to adjust it according to the histogram. I didn't apply auto adjustment of levels because I found it doesn't make much difference.
The second step is to crop the photo. I set 1:1 aspect ratio so I cut excess space of it. Next step, I resized every image to 875 x 875 pixels preapred for the final grid with the size of 4000 x 4000 pixels. Now I began to create the final grid. Firstly, I made a blue background image at a size of 4000 x 4000 pixels. Then I opened the images I edited and did cut/paste on the blue background. To make better layout of images, I manipulated a white spacer (100 x 100 pixles) to aid me with the arranging the image to a right position. After make sure everything look perfect for the final grid, I flattened all layers (incl. the background layer, photo layers) and saved as PNG and JPEG files.
This Typology project is really fun and the advanced Pixlr's works for me. It was a little frustrating only when I was using a spacer to move the images on the background layer. Other than that, everything is easy and interesting.      


Thursday, October 11, 2012

Generative Art Projects


I. Scribbler Project
By using Scribbler program, I simply drew some curve lines in the upper one. Then adjusted the line thickness and scribbliness in the scribbler setting. It was my first trial and wasn't perfect. But I really liked the result. Literally, I had some ideas about the feature of this app. after more practice. Then I came up with the second one with stars and tried different colors (blue and yellow). I did pause the scribbler so I can adjust setting during it's working. Since the scribbler doesn't have save command, you have to find a way to save your work. There is a QQ messenger screen grab app. installed on my computer, so I captured the picture by that. And I intentionally cut the half-way scribbled ones.


II. Scribbler Too Project
Scribbler Too is definitely more advanced version than Scribbler. It has all variables for each value in setting (incl. canvas, brush, color). Moreover, you can even upload your own preferred pictures and start from that. It's said one of the most important improvements of Scribbler Too is that you are able to save the image. However, it didn't work well for me. After I saved my work with scribbler, I can't open it again. Then I found the only way to get access to my stuff is to drag the file to the Scribbler Too sketching area. I did that, then applied my QQ app. to grab the picture so that it can be saved as JPEG file.
For the first one, I started from the uploaded photo of my dog Lacey. I adjusted several values in brush setting including Radius, Connections, Stroke and Fuzzyness and applied different colors to the Lacey's eyes, eye brows, mustache, tail and body trunk. The following second version of Lacey, I made it for fun. Wasn't sure may look weird.
In the second part of this project, I need to create an image that appears to have a sense of volumn. I sketched a structure mimicing the endoplasmic reticulum in biology cell. As you can see, I used grey color line and adjusted in brush settings such as stroke size, fuzzyness, radius, etc.
The last one actually came from one of my initial trails. It's supposed to be nest-like shape. But it looks somehow different afterwards. I used purple red and blue colors for the sketching, and also turned the background color to red in the canvas setting. I want to show my early results working on the Scribbler Too.


III. Flame Project
The flame painter is awesome. First, I can't help to comment on it. You draw with fire. Multiple ways ends up with surprising effects. Even though it is almost impossible to drew something literal, you can make abstract images with interesting flow to express some sort of emotion. Varied starting points may result in different results. Of course, you can also choose different color and change settings. The upper one is about two connected hearts meaning sweet love. Red and blue were used as color based of the flame. It was not easy to handle and control the flame painter. This one turned out the best one after I failed many times. The second one I wanted to play more with the brush by cycling to create a different effect. It's so neat by driving the brush in multiple ways I can make some places with more density and some ones look more spacious. Therefore, I created second one named "Bloody" on white background. My work was easily saved with the Flame as it has save command.   

Tuesday, October 2, 2012

Video Mahups

 
The song I made on Soundation.com the week before is actually hard to match with many videos. I was looking for movie trailers and music videos to see if they can be mashed up with my song. It took me long time to pick videos. The Filelab video editor program is very easy to deal with once you figured the function of each button. The tutorial wegpage cannot be opened due to the JAVA version problem. Even though I upgraded my JAVA version, my computer was unable to show that tutorial video. So I had to spend time practicing and trying the Filelab. Before the Kung Fu video for this week assignment was done, I made another cartoon video mashup using three old cartoons and a Japanese child song as practice. These cartoons are the Thrifty Pig, the Kangaroo Kid and Donald's Decision. The best parts were included in this cartoon video mashup which looks very funny. In fact, I prefer the free style making video mashup using any song and any videos we like.

Three Kung Fu videos were chosen for the video mashup using my song after I browsed hundreds of videos throughout all various topics. As I mentioned, it was very tough for me to find suitable videos. The videos finally chosen are about Kung Fu jumps and techniques. I did some editing such as cut the parts not needed (e.g. some waiting, preparing time; less exciting ones; and ones hard to mix with other parts); split the continuous one into many courses (so all the Kung Fu moves are presented in a more organized way); and rearranged the order of each small video parts properly. Since all these videos have the same theme, it was not too difficult when I mashup them together. Then I added my song as an overlay and excluded some less interesting part of my song so that the length of music is the same as the video time. Overall, the tempo of my song seems good with the whole mashup video. It was sort of successful video as this is the best I can do. My song was not super great which brings more difficulties in this project. If one thing could be changed about my mashup, I would definitely apply a better song in my video mashup with more diverse videos.